Benefits:
- Free to low-cost
- There are many tool options and workflows that will allow you to fit a variety of captioning needs.
Limitations:
- Time-intensive, manual process.
- Requires many steps to complete.
- Requires a medium level of technical expertise.
- This option will not give you a sense about whether the caption files are accurate.
- There are many tool options and workflows that will let you fit a variety of captioning needs.
Summary:
You can create caption files yourself using web-based tools and software like MediaSpace, YouTube, and Camtasia Studio. This option is low-cost, but is time-intensive and requires a medium level of technical expertise to complete. We'd recommend using this option only if you have staff or student employees available to type out the captions manually.
For ease of use, you might prefer ordering caption files through a third-party captioning service. For more information, read our guide on hiring a third-party captioning service.
Ordering Machine Captions from MediaSpace
As of March 2025, videos uploaded to MediaSpace have machine-generated captions automatically ordered and applied at no charge. Uploaders will receive an email stating that captions are being ordered and advising them to review the captions once they are ready. Videos not in English will need to have the automatic captions removed and re-requested in the appropriate language. Any inaccuracies can be corrected using the guidance provided on the MediaSpace Help site.
Creating caption files in YouTube
YouTube offers a free captioning service that automatically creates captions for your video, which makes it a good place to begin if you are creating your own captions, especially if you already have a YouTube account. However, it is important to keep in mind that the accuracy of the captions is based on the sound quality of your video content, and clarity of the speaker(s) in your video. Additionally, if the language in your video is very discipline-specific, or has complex terminology, this method might not produce accurate caption files.
Since YouTube does not create captions with 100% accuracy, it should be considered a first step toward creating your own captions. This help article from YouTube provides guidance on using their Automatic Captions service.
Creating caption files in Camtasia
You can also create captions using Camtasia Studio. As you begin, we recommend using the built-in Speech-to-text tool to generate automatic captions, then later editing the caption file for inaccuracies. This feature is only available in Camtasia Studio for PC.
Note: If you have not already purchased Camtasia Studio and would like to do so, visit the MSU Computer Store.
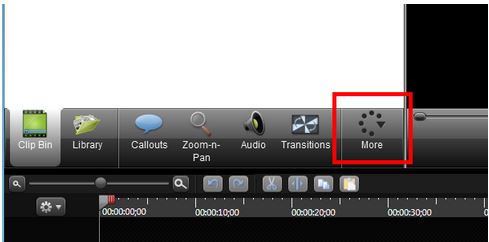
Step 1: Using Speech-to-text (STT) to generate captions in Camtasia
Open Camtasia and start a new project. To begin using STT, click on "More" along the bottom of the screen.
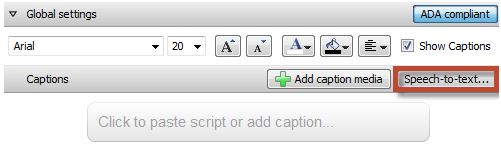
Next, select Captions from the drop-down menu.

From here, click on the Speech-to-text button as shown below. This will automatically add captions to your video.
Tips for Generating Accurate Speech-to-text Captions
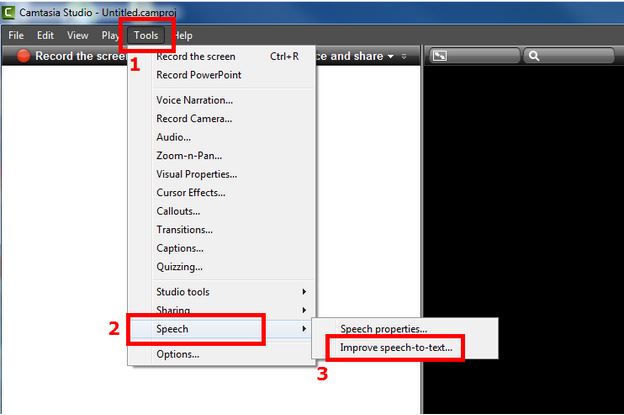
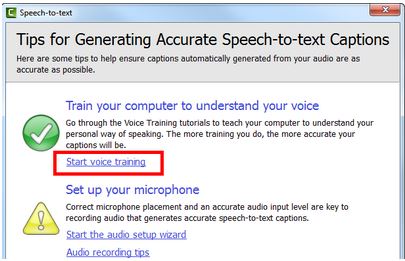
Consider using the voice training module in order to get higher accuracy when using STT. However, keep in mind, that the voice training module will only work with one voice profile at a time.
To do this, click on "Tools" located at the top of the screen. From the drop-down menu, hover over "Speech." Click on "Improve speech-to-text..."
A new window like the one below should pop up. Under the section titled "Train your computer to understand your voice," click on the "Start voice training" link.
Another window should pop up, click "Next." This should begin the voice training process as shown below. Follow the steps by reading the text given out loud.
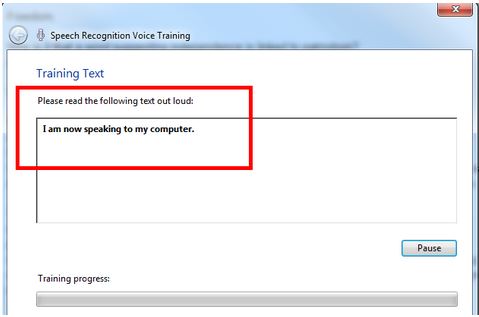
Once the training process is finished, your computer should better understand your personal way of speaking, which will help improve accuracy when captioning.
Step 2: Editing captions to correct inaccuracies using Camtasia
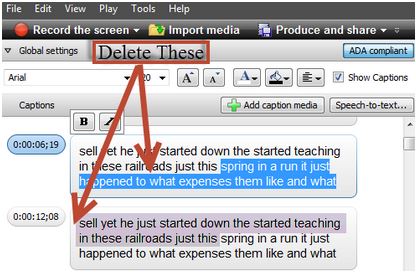
If your caption is more than two lines long, split your caption into multiple captions consisting of two lines or less. This will prevent the system from cutting off the captions along the left and right sides of the video player.
Three-line captions must be split as shown below:
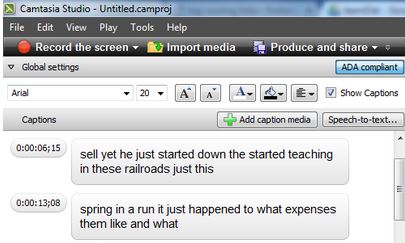
Two-line captions are the goal as shown below:
Creating Two-Line Captions
To create two-line captions, begin by finding the caption you want to split.
1. Select that caption by clicking on it, and moving the waveform cursor over the center of the caption.
2.Once this is done, you can click on the split button.
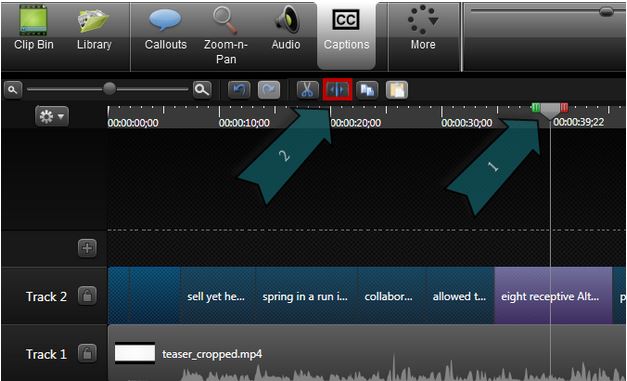
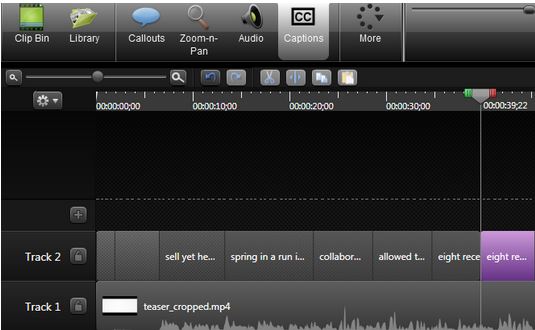
Your caption will be duplicated in each section of the split video. Pick a good spot to make the split to ensure readability.
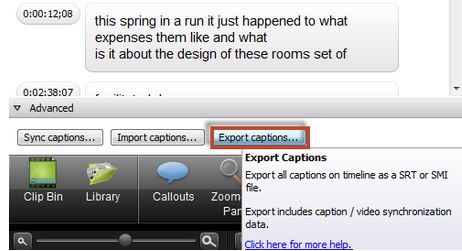
Exporting Your Captions
Once you are finished captioning your video, click the "Export captions" button and save it as an .srt file.